Quantcast
Channel: soldering station – Hackaday
Viewing all 28 articles
Browse latest View live

Tools: Aoyue 968 3-in-1 soldering and rework station

$
0
0

aoyue968-front

The $10 “fire-starter” is the most common beginner soldering iron. These are simple irons with a hot end, a handle, and little else. There’s no temperature control or indication. Despite their simplicity, they’ll do just about anything. You can solder any legged chip type with this type of iron. We used fire-starters in the lab for years.

Eventually, we wanted a hot air rework tool to salvage SMD parts and solder QFN chips. Aoyue is a relatively unknown Chinese brand that makes soldering stations very similar in appearance and function to Hakko. Aoyue stations are recommended and used by Sparkfun Electronics, something that factored heavily in our decision to buy an Aoyue. Read more about our experiences with this tool after the break.

aoyue968

The Aoyue 968 combines three tools: an adjustable soldering iron, a digitally controlled hot air tool, and a fume extractor. We usually prefer separate units because the parts can be individually upgraded or replaced, but this combined tool is much cheaper and saves valuable bench space in the lab.

iron-and-filter

The soldering iron temperature is adjusted with a knob, with a range of 200 to 480 degrees Celsius. We usually solder between 300C and 350C.

The iron handle is an inexpensive plastic assembly that eventually broke along the threads that hold the iron in place. New irons are available for around $15, but we fixed the old one with some high-temperature epoxy.

The fume extractor is a tube that attaches to the soldering iron. The hot air rework tool air intake is used to suck fumes away from the tip of the iron. The fumes are filtered with a small plastic net before exiting through the hot-air tool. It works really well, and eliminates the breath-hold-solder-breath system we used to avoid getting a nose full of flux fumes. The tiny filter doesn’t look like it does much, but it came with a replacement. We worry somewhat about the long term effects of coating the hot air tool’s heating element with rosin and other crud.

iron-holder667

It’s pretty obvious that the iron holder wasn’t intended for this particular iron because the holding ring doesn’t fit the fume extractor attachment, this is a bit of a pain.

rework-and-nozz

The hot air rework tool has a temperature range of 90 to 480 degrees Celsius. We use 400C hot air to remove passive parts, and 420C to remove chips.

The temperature is adjusted in 2 degree increments using the digital numerical readouts. The air flow rate is adjusted with a knob, volume is indicated by a floating ball gauge. The hot air tool came with a half-dozen nozzles, we’ve only used the medium size.

aoyue-inside1

We’re extremely happy with the Auyoe 968. It’s already paid for itself twice, in terms of not having to replace $10 soldering irons every month. If it breaks, we can buy a new one without regret. The hot air rework tool has opened a world of possibilities for salvaging parts and repairing projects. The adjustable soldering iron provides enough heat to solder something big and dirty, but also adjusts downward so it doesn’t destroy delicate traces.  We haven’t needed to replace the iron tip or either heating element, but we understand they’re compatible with parts from other major manufacturers .

aoyue-inside2

Until recently, Auyoe was only available in Asia and Europe. We bought this one in Germany for about $100. The Aoyue 968 is now available on Amazon in North America, Sparkfun also has several other Aoyue models.

Sure, Aoyue isn’t haute couture for geeks like a Hakko or Weller, but for less than a third of the price you get a respectable rework  station that’s not a lifetime investment. As heavy DIY users, we think this station has performed great. We highly recommend it to anyone buying their first serious soldering iron. If you’re a pro with an industrial budget, buy yourself a Hakko or Weller; we’re doing just fine with our Aoyue!

Learn about soldering with an iron and hot air, and see an Aoyue in action, in the Sparkfun soldering tutorials.

Are there any tool reviews you’d like to see?


Posted in reviews, tool hacks

Putting the flex back into the RDS 80 soldering station

$
0
0

ersa_soldering_iron_fix

[Markus] was looking to upgrade his soldering station, and having had good luck with Ersa in the past, opted to purchase one of their new stations, the RDS 80.

Once he got the iron home however, he was very disappointed to see that while his previous Ersa model used a silicone cable to connect the iron to the base station, his new iron used a stiff, non heat-resistant PVC cable instead. He found plenty of people complaining about the same issue online, but no one seemed to have a fix, so he set off to figure it out for himself.

He thought that he could disassemble the iron and change the wiring out once it was apart, but it seemed that there was no way of doing so without destroying it. Instead he chopped the wire off at the end of the soldering iron, replacing it with a new silicone cable. He did the same thing at the base station end, since he was forced to reuse the proprietary 4-pin plug Ersa decided to use there.

His modifications worked out nicely, and he is now happily soldering away.

If you happen to have one of these soldering stations, be sure to swing by his site to get a closer look at how he swapped out the cable.


Filed under: tool hacks

Ask Hackaday: What’s an easy way to build a potentiometer for a soldering iron?

$
0
0

diy-potentiometer-2

[Lee] wrote in to share the work he’s done in building a controller for his soldering iron. The idea started when he was working with an ATX power supply. He figured if it works as a makeshift bench supply perhaps he could use it as the source for an adjustable iron. To get around the built-in short-circuit protection he needed a potentiometer to limit the current while allowing for adjustments. His first circuit used a resistor salvaged from an AT supply and a trimpot from some computer speakers. That melted rather quickly as the pot was not power rated.

This is a picture of his next attempt. He built his own potentiometer. It uses the center conductor from some coaxial cable wrapped around the plastic frame of an old cooling fan. Once the wire was in place he sanded down the insulation on top to expose the conductor. The sweeper is a piece of solid core wire which pivots to connect to the coil in different places. It works, and so far he’s managed to adjust a 5V rail between 5A and 20A.

How would you make this system more robust? Short of buying a trimpot with a higher power rating, do you think this is the easy way to build a soldering iron controller? Let us know by leaving your thoughts in the comments.

We think this is resistor is in-line with the DIY potentiometer. Shouldn't this be a part with a much higher power rating? Close view of the sweeper contacting the exposed copper in the windings. Finished potentiometer from the top
Filed under: Ask Hackaday

Homemade Soldering Stations for Cheapy Irons

$
0
0

Homemade Soldering Station for cheap Soldering Irons

Everyone reading this post has had a cheap pencil-style soldering irons that plug straight into the wall at some point in their lives. Even if you’ve upgraded to a professional soldering station, you probably have one of these cheapy irons kicking around that are slow to heat up to an unknown temperature. [Pantelis] thought he could fix the latter problem with his Homemade Soldering Station for those basic soldering irons.

Since the intent of the soldering station was to control the temperature of the iron [Pantelis] had to figure out a way to sense the temperature. He did this by strapping a thermocouple to the iron near the tip. The wires were run back through the handle and then along the power cord.

Homemade Soldering Station for cheap Soldering Irons

Both the stock iron plug and the thermocouple leads plug into a box put together specifically for this project. In the photo you’ll notice the LCD screen that displays both the target and actual temperatures. The linear potentiometer below the LCD screen is used to set the target temperature. The LED to the right alerts the operator that the iron is heating up and when it is at temperature and read to go.

Although there isn’t a lot of schematic or part list information, [Pantelis] did do a good job photo documenting his build. Check it out, it’s worth a gander.


Filed under: tool hacks

Mobile Soldering Workstation Sets Up Quickly, Lets You Get To Work

$
0
0

mobilesolderingworkstation

Who here hasn’t put off soldering up a project because pulling out and setting up all your soldering gear is a pain? A lot of hobbyists don’t have a dedicated workbench for such activities and their gear may even be packed away somewhere inconvenient. [laxap] has come up with a solution using a plastic toolbox as a base for his Mobile Soldering Workstation.

[laxap] started with a regular off the shelf toolbox that has a lid and three drawers on the bottom. Although the Weller soldering iron base fit nicely in the bottom drawer, it did necessitate ditching the middle drawer for clearance. The compartmentalized top drawer is unmodified and holds parts and supplies in an orderly fashion.

Lifting up the lid of the box reveals a removable tray, which as intended, is a great spot to store tools such as a multimeter and wire strippers. The area under the removable tray is reserved for a power strip and power cord storage. A hole drilled in the side of the toolbox allows quick access to the power strip’s plug, a quick pull out and plug in is all that is necessary to get this workstation powered up.

That front flip up panel was made specifically for this project. Not only does it help keep the drawers from sliding open during transport, it also holds a lamp to aid in seeing what you’re doing! A bent aluminum strip acts as a latch to keep the panel in position.

It’s a pretty simple idea but it certainly gets the job done and makes soldering a whole bunch more convenient. If you like mobile workbenches, you may want to check out this all-wooden shelf style or one that features integrated solderless breadboards.


Filed under: tool hacks

A New Handle For An Old Soldering Station

$
0
0

About 20 years ago, [Simon] spent a few week’s pay on a soldering station, a Micron W/2172. It served him well for the past few decades, but lately he hasn’t been able to find a supply of new tips for it. The Micron went into a cupboard and he upgraded to a newer Hakko soldering station.

The old Micron was still sitting in the cupboard when [Simon] realized both stations use a 24V supply for the heater, and you can buy replacement Hakko handle for a few bucks. Having two soldering stations would be handy, so [Simon] set out to convert the old Micron station to accept Hakko handles.

The only technical challenge for this modification was to figure out how the old circuit board in the Micron would read the thermistor  in the new handle. The original circuit used a dual op-amp, with one side used to amplify the thermocouple and the other to compare it to the temperature set point. After measuring the set point and a bit of Excel, [Simon] had a small circuit board that would replace the old op-amp. After that it was only a matter of wiring the new handle into the old station, calibrating the temperature settings, and enjoying the utility of two soldering stations.


Filed under: repair hacks, tool hacks

A DIY Mobile Soldering Iron

$
0
0

Cordless soldering irons are, as a rule, terrible. A few months ago, you could pick up a cordless soldering iron from Radio Shack that was powered by AAA batteries. You can guess how well those worked. There are butane-fueled soldering irons out there that will heat up, but then you’re left without the requisite degree of temperature control.

[Xavier] didn’t want to compromise on a mobile soldering iron, so he made a desktop version portable. His mobile temperature controlled soldering iron uses the same electronics that are found in inexpensive Hakko clones, and is powered by a LiPo battery.

The soldering station controller comes directly from eBay, and a DC/DC boost converter accepts just about any DC power supply – including an XT60 connector for LiPo cells. A standard Hakko 907 iron plugs into the front, and a laser cut MDF enclosure makes everything look great. There were a few modifications to the soldering station controller that involved moving the buttons and temperature display, but this build really is as simple as wiring a few modules together.

With an off-the-shelf LiPo battery, the iron heats up fast, and it doesn’t have a long extension cord to trip over. With the right adapter, [Xavier] can use this soldering station directly from a car’s cigarette power port, a great feature that will be welcomed by anyone who has ever worked on the wiring in a car.


Filed under: tool hacks

DIY Hakko Soldering Station

$
0
0

[Julez] wanted another soldering station, so he decided to build one himself using a Hakko 907 soldering iron (or a clone). Of course, he could have bought a station, but anyone who reads Hackaday doesn’t require an explanation for why you would build something you could buy.

The station has two switchable outputs so you can use two different irons (perhaps with different tips) although you can only use one at a time. [Julez] bought a case with a transparent top from eBay and also got a digital temperature controller from eBay, which is the heart of the project. As for the actual iron, you can find clone versions of the 907 handpiece for well under $10.

Because the station uses a module, the actual wiring isn’t terribly difficult. There’s a pot to control the temperature and the controller directly connects to the iron’s heating element and temperature probe. There’s also a standby switch that reduces the temperature using a fixed resistor in series with the control pot.

[Julez] found a wide variation in 100-ohm pots, and explains how that affects the calibrated temperature scale in the video below. This is a good-looking and easy project and, after all, we all need soldering irons. We’ve covered homebrew stations before from the sophisticated to the very cheap. If you’d rather destroy than create, you might consider a desoldering station instead.


Filed under: tool hacks

Feel Extreme Workbench Envy After Seeing The Tempel

$
0
0

For those of us with space to spare, our workbenches tend to sprawl. The others who are more space limited will certainly feel envy at [Love Hultén]’s beautiful Tempel workbench.

The workbench appears at first to be a modern interpretation of a secretary’s desk. There are some subtle hints that it is no ordinary piece of furniture. The glowing model of our solar system on the front, for example.

With the front folded down, rather than the expected leather writing pad and letter sized drawers, a few more oddities become apparent. The back is a pegboard which holds a small selection of tools. To the left, a checkered grid obscures speakers. Knobs control volume There are even USB ports. On the right sits another speaker. Banana jacks let you use the analog voltmeter. Most appealingly, the indestructible Hakko 936 soldering iron has been entirely integrated into the structure of the desk.

If you press the right button on the front, the desk will reveal its last secret. It contains an entire workstation somewhere behind the array of drawers on the front. A linear actuator pushes a computer monitor up from inside the cabinet, covering the pegboard in the back. Awesome.

There is a build log, but unfortunately it’s been imageshacked and only the words remain. We think [Love Hultén] has finally managed to build a soldering station that’s welcome in every room of the house except for the garage.


Filed under: computer hacks

Portable Workbench Crams An Entire Workspace Into One Box

$
0
0

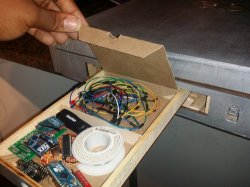
Making on the go is sometimes required in today’s busy lives, and if you find yourself traveling — say, off to university like [ZSNRA] — then a convenient solution is required. To that end, a portable electronics workbench was built in the shape of a relatively nondescript plywood box.

Plywood and foam-core are the main materials used in building this maker’s bug-out box, with two fir runners along the bottom so the case is not resting on the hinges. Inside, [ZSNRA] has packed a staggering amount of hardware which results in an 11kg suitcase.

Power StackHere goes — deep breath now: wires, solder, resistors, transistors, capacitors, diodes, clips, switches, logic chips, non-logic chips, an Arduino, ATmegas, fuses, pliers, wire strippers and cutters, angle cutters, tweezers, a 66-piece screwdriver set, a desoldering pump, 12 needle files, a hacksaw blade, a multi meter, oscilloscope, power source, four outlets built into the case(!), steel wool, a third hand, a soldering station, two handbooks, and a breadboard.

Whew.


The work surface is an ESD mat on the inside of the case’s front face that is comfortable enough to work with, though we are surprised that it doesn’t also fold out somehow to create an even larger work-space.

For an elegant — if slightly less mobile — workbench solution, check out The Tempel. Now if you’re looking for ideas on how and what to carry we still think [Kenji Larsen] has the ultimate hacking kit.

[Thanks for the tip, Zaphod! via /r/electronics]


Filed under: hardware, tool hacks

One Soldering Controller To Rule Them All

$
0
0

If your favourite programming language is solder, they you’ve surely worked your way through a bunch of irons and controllers over your hacker existence. It’s also likely you couldn’t pick one single favourite and ended up with a bunch of them crowding your desk. It would be handy to have one controller to rule them all. That’s just what [sparkybg] set out to do by building his Really Universal Soldering Controller. His intent was to design a controller capable of driving any kind of low voltage soldering iron which used either an in-line or separate temperature sensor (either thermocouple or resistive PTC).

This project has really caught on. [sparkybg] announced his build about two years back and since then many others have started posting details of their own Unisolder 5.2 builds. [zed65] built the version seen to the right and [SZ64] assembled the boards shown at the top of this article.

The controller has been proven to work successfully with Iron handles from Hakko, Pace, JBC, Weller, Ersa, as well as several Chinese makes. Getting the controller to identify one of the supported 625 types of iron profiles consists of connecting two close tolerance resistors across the relevant pins on the 9-pin shell connector. This is a brilliant solution to help identify a large variety of different types of irons with simple hardware. In the unlikely situation where you have a really vague, unsupported model, then creating your own custom profile is quite straightforward. The design is highly discrete with an all analog front end and a PIC32 doing all the digital heavy lifting.

To get an idea of the complexity of his task, here is what [sparkybg] needs to do:

“I have around 200 microseconds to stop the power, wait for the TC voltage to come to its real value, connect the amplifier to this voltage, wait for the amplifier to set its output to what I want to read, take the measurement from the ADC, disconnect the amplifier from the TC, run the PID, and eventually turn the power back on. The millivolts to temperature calculation is done using polynomial with 10 members. It does this calculation using 32bit mantissa floating point numbers and completes it in around 20 microseconds. The whole wave shaping, temperature calculation, PID and so on is completed in around 50-60 microseconds. RMS current, voltage and power calculations are done in around 100 microseconds. All this is done between the half periods of the mains voltage, where the voltage is less than around 3 volts.”

The forum is already over 800 posts deep, but you can start by grabbing the all important schematic PDF’s, Gerbers, BoM and firmware files conveniently linked in the first post to build your own Unisolder5.2 controller. This Universal Controller is a follow up to his earlier project for a Hakko T12/T15 specific controller which gave him a lot of insight in to designing the universal version.

[sparkybg] has posted several videos showing the UniSolder5.2 controlling several types of Irons. In the video after the break, he demonstrates it controlling a Weller WSP80.


Filed under: hardware

Another Helping Hands Build

$
0
0

[Punamenon2] wanted a soldering station with integrated helping hands. He couldn’t find one, but he decided it would be a good 3D printed project. In all fairness, this is really 3D printing integrating several off-the-shelf components including a magnifier, a soldering iron holder, a soldering iron cleaner, a couple of “octopus” tripods, and some alligator clips. Total cost? Less than $30.

In addition to holding the Frankenstein monster together, the 3D printed structure also provides a storage tray with special sloped edges to make removing small screws easier.

We were a bit surprised at the use of the cell phone tripods for the arms. Usually, we see these builds using machining coolant pipe. To fit the alligator clips to the tripod, [Punamenon2] had to drill some holes in the arm, whereas the coolant hoses are easy to work with.

We were a little disappointed to not find the STL files for the base, but on the other hand, you’d probably have to customize it for whatever parts you had on hand anyway. We also wondered if the base ought to have a place to fill it with sand or something for weight. Of course, you can find plenty of similar builds on Thingiverse, including printable arms, if you want to borrow a few parts for your design. We’ve seen some similar builds before, and each one is a little different. There’s also plenty of other options.


Filed under: 3d Printer hacks, tool hacks

Field Expedient Quenches Your Thirst for a Soldering Station

$
0
0

In the category of first world problems, it seems that these days no one is happy with just a plain old soldering iron. Today, everyone wants a station with bells, whistles, and features. If all you have is the iron, take heart. Grab a soda, drink it, and then duplicate [Kalvin178’s] makeshift solder station.

The idea is simple: cut or tear a soda can and press in the sides to make a V-shaped holder for the iron. A smaller part of the can might hold a wet paper towel, a sponge, or some copper scrubbing pads to clean your tip.

We tried to think about using a lollipop stick to hold your solder, but we didn’t come up with anything sufficiently clever. Some cheap reading glasses might serve for magnification and a dollar store USB or battery fan could blow fumes.

We’ve seen clothes pins used for helping hands. We’ve also seen people make quick and dirty iron holders out of stiff wire.

If you really want to make your own big-time station, you can. If that’s not hackish enough for you, then you can always strap on a thermocouple.


Filed under: tool hacks

Roll Your Own JBC Soldering Station

$
0
0

[Marco Reps] was soldering some boards with a lot of thermal mass and found his usual soldering iron was not up to the task. He noticed some professional JBC soldering stations that he liked, but he didn’t like the price. Even an entry-level JBC station is about $500 and they go up from there. He decided to build his own, but it did take awhile to complete. You can see two videos about the project, below.

How can you build your own soldering station and still claim it is a JBC? [Marco] noticed that the real performance of the iron came from the tip — what JBC calls a cartridge. In addition, the handle provides good ergonomics. You can buy the tips and handles from JBC for considerably less than a complete station. You just have to add the electronics to make it all work.

Armed with a handle and a cartridge, he set out to build the power supply. The cartridge has a heater and a sensor, so a simple PID controller ought to do the trick. However, [Marco] found the wiring is a bit different than in other tips and would require some special techniques.

He started with a Maxim thermocouple chip. Unfortunately, the Maxim part wasn’t for the right kind of thermocouple and had trouble dealing with the tip being grounded. He also found the cartridge rated at 250 watts required about 40V to get to that power level.

There’s more to the design and [Marco] goes through all the details. His initial design used a triac, although he didn’t like the performance. By the end of the first video, he had a working prototype built around a very large transformer.

The second video addresses changes he made and packaged the device in something a little more practical than the prototype. His initial attempt to replace the triac with a solid state relay met with a bad end, but he eventually rolled his own solid state relay with high-efficiency FETs.

This reminded us of the same trick using Hakko hardware. For that matter, we’ve seen people use Weller tips, too.

DIY Power Supply and TS100 Outlet Combo Shows off Great Layout

$
0
0

Here’s a combination of two important electronics workbench tools into a single, cleanly-assembled unit. [uGen] created a DC power supply complete with a plug for the popular TS100 soldering iron, and it looks great! Most of the main components are familiar offerings, like a LM2596 DC to DC buck converter board and a DPS3003 adjustable DC power supply unit (we previously covered a DIY power supply based around the similar DPS5005.) The enclosure is an economical, featureless desktop instrument case whose panels were carefully cut to fit the necessary components. There’s one limitation to the combo: the unit uses a switch to either power an attached TS100 iron, or act as a general DC power supply. It cannot do both at once. So long as one doesn’t mind that limitation, it’s a nice bundle made from very affordable components.

It’s easy for something to look like a hack job, but to look clean and professional involves thoughtful measurement, planning, and assembly. Fortunately, [uGen] has supplied all the drawings and bill of materials for the project so there’s no need to start from scratch. Also, don’t forget that if the capabilities of the DPS power supply units leave you wanting a bit more, there is alternative firmware in the form of OpenDPS; it even offers a remote control feature by adding an ESP8266.


Business On The Outside, Electronics Workstation On The Inside

$
0
0

As an electrical engineering student, [Brandon Rice] had the full suite of electronics tools you’d expect. Cramming them all into a dorm room was doable — but cramped — a labour to square everything away from his desk’s top when he had to work on something else. To make it easier on himself, he built himself a portable electronics workstation inside the dimensions of a briefcase.

Built from scratch, the workstation includes a list of features that should have you salivating by the end. Instead of messing with a bunch of cables, on-board power is supplied by a dismantled 24V, 6A power brick, using a buck converter and ATmega to regulate and display the voltage, with power running directly to  12V and 5V lines of a breadboard in the middle of the workstation. A wealth of components are stored in two dozen 3d printed 1″ capsules setting them in loops pinned to the lid.

If all this was not already enough, there’s more!

Since he’ll be soldering a lot, there’s obviously an included soldering station, but were you expecting a helping hand and a carbon-filtered fume extractor? How about a folding overhead light to boot? Spools of wire are off to the rear to be tugged on when needed, and a drawer tucked into the side keeps circuit boards and jumper wires organized. There’s also a power strip along the other side — [Rice] notes that it was handier than he realized — for any other devices you might need. There’s even a built-in Arduino.

Hungry for more? How about a second serving, or even desert?

Auction Finds Combined For A Unique Desoldering Station

$
0
0

If you are in the market for a high-quality soldering iron, a rewarding pursuit can be attending dispersal auctions. It is not unusual to see boxes of irons, as anything remotely iron-like is bundled up together by the auctioneer into a lot with little consideration for what combination has been gathered. [Stynus] found himself in this position, the proud owner of a Weller DSX80 desoldering iron from an auction, but without its accompanying solder station required for it to work. Fortunately, he had another Weller solder station, not suitable for the DSX80 as it stood, but which provided a perfect platform for a home-made Weller DSX set-up.

The old station had a side-mounted valve and a 24V input, so he had to install a toroidal mains transformer and move the valve frontwards. Fortunately, this style of Weller station case was frequently available with just such a transformer installed, so there was plenty of space in the enclosure. A custom board was then created for a temperature controller centered upon a PIC microcontroller, and a new front panel was crafted to accommodate a Nokia 5110-style LCD display.

The resulting unit with its upper half repainted, is a pleasing and professional-looking project. Heated desoldering irons are an extremely useful tool that anyone should consider for their arsenal, but not all of them are as good as this Weller-based one. We recently reviewed a much cheaper example, with comedic results.

The Modern Analog Soldering Station

$
0
0

There is a certain sense of accomplishment one gets when building their own tools. This is what [Alejandro Velazquez] was going for when he built his own soldering station. Sure you can get a decent station for a pittance on Amazon, or eBay. You can even build your own microprocessor controlled station. [Alejandro] is currently interested in analog electronics, so he went that route to build his own closed-loop station.

The handle is a 50 watt, 24-volt affair with a thermocouple. You can find this handle on many Hakko 907 clone soldering stations, often referred to as the 907A. The station itself is completely analog. A triac switches the current going to the heater. The triac is controlled by a PWM signal. The PWM itself is generated and regulated by an LM324 quad op-amp, which is the heart of the station. The op-amp compares the setpoint with the current temperature read from the soldering handle’s thermocouple, then adjusts the duty cycle of the PWM signal to raise, or lower the temperature.

It’s a classic control system, and the schematic is definitely worth checking out if you want to understand how op-amps can be used to create complex operations.

You can find plenty more information on analog electronics right here on Hackaday — we’ve covered thermocouple amplifiers, as well as instrumentation amps. If you’re more of a digital man, check out this Arduino controlled soldering station!

Homemade Magic Makes the Metcal Go

$
0
0

First soldering irons are often of the Radioshack or Maplin firestarter variety. They’re basically wall power shorted across a nichrome heater or similar with some inline resistance to make it harder to burn down the house. You plug them in, the current flows, and they get hot. Done.

If you stick with the hobby for a while, these eventually get replaced with something like the venerable HAKKO FX-888D or that one Weller everyone likes with the analog knob. These are much improved; having temperature control leads to a more consistently heated tip and much improved soldering experience.

Entering the electronics workplace one comes across the next level of quality soldering iron: high end HAKKOs, Metcals, JBCs, and the like. Using one of these irons is practically a religious experience; they heat in a flash and solder melts while you blink. They even turn off when you put the handpiece down! But they’re expensive to buy (hint: think used). What’s a hobbyist to do?

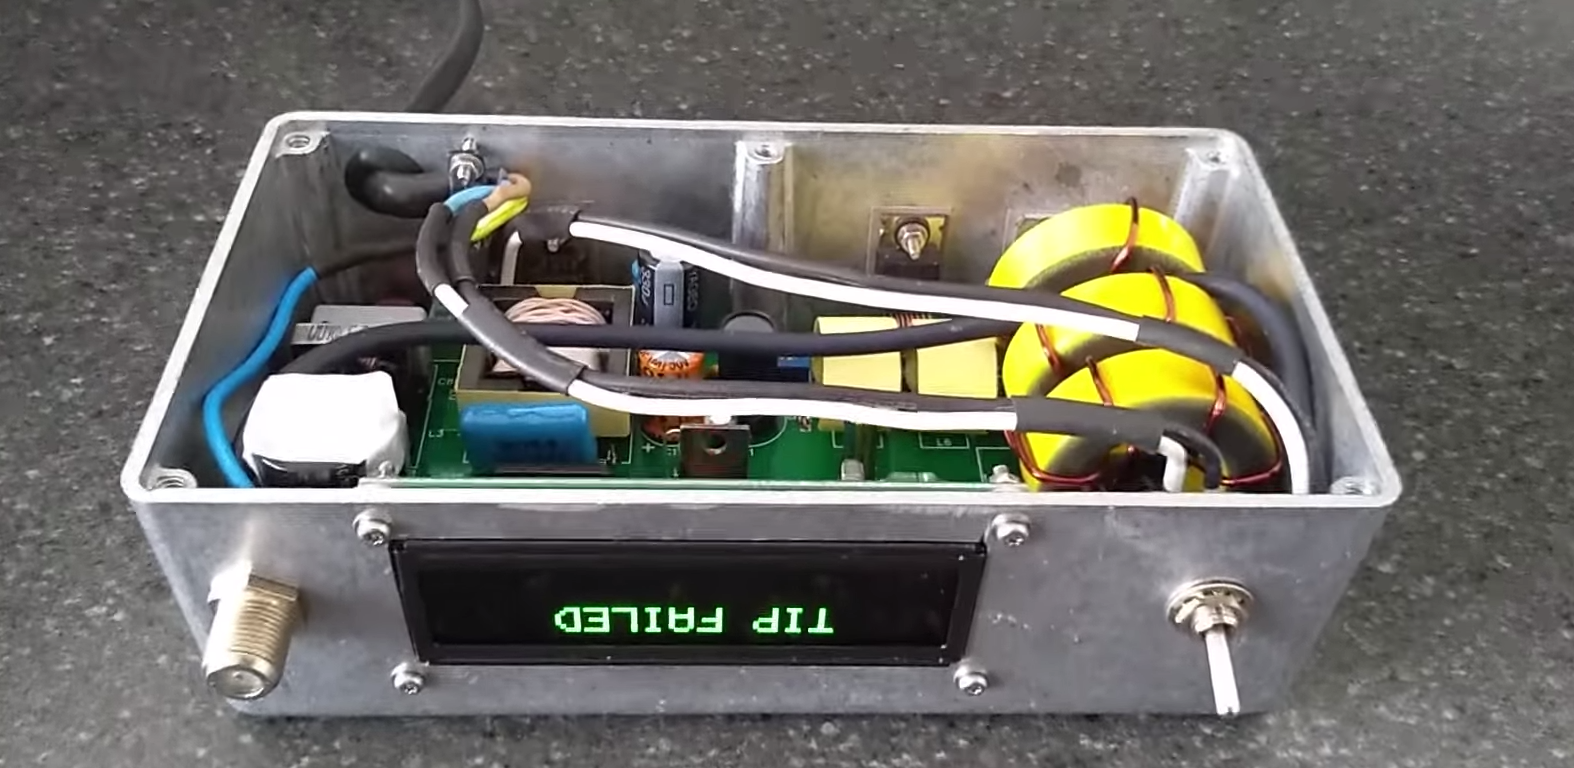
[SergeyMax] seems to have had this problem. He bit the bullet, figured out how the Metcal works, and made his own base. This is no mean feat as a Metcal might look like a regular iron but it’s significantly more complex than ye olde firestarter. The Metcal magic is based on a oscillating magnetic fields (notice the handpiece is connected via BNC?) interacting with a tip bearing a special coating. In the presence of the changing field the tip heats up until it hits its Curie temperature, at which point it stops interacting with the magnetic field and thus stops heating.

When the user solders, the tip cools by sinking its heat into the part and drops below the Curie temperature again, which starts the heating again. It’s like temperature control with the sensor placed absolutely as close to the part as possible and a nearly instant response time, without even a control loop! [SergeyMax] has a much more thorough description of how these irons work, which we definitely recommend reading.

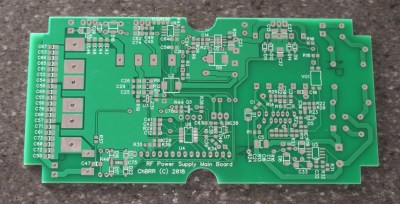
So what’s the hack? Based on old schematics and some clever reverse engineering from photos [SergeyMax] built a new base station! The published schematic is as rich with capacitors and inductors as one could hope. He didn’t post source or fab files but we suspect the schematic and photos of the bare board combined with some tinkering are enough for the enterprising hacker to replicate.

The post contains a very thorough description of the reverse engineering process and related concerns in designing a cost efficient version of the RF circuitry. Hopefully this isn’t the last Metcal replacement build we see! Video “walkthrough” after the break.

Edit: I may have missed it, but eagle eyed commentor [Florian Maunier] noticed that [SergeyMax] posted the sources to this hack on GitHub!

Thanks for the tip Freddie!

BST-863 Hot Air Rework Station Teardown

$
0
0

[Voltlog] has had a 952 hot air rework station for a long time. You’ll recognize it when you see it — they are the ubiquitous soldering iron and hot air gun combination from China sold under numerous brand names. He didn’t think the old station was as good as some of the newer devices available, and did a teardown and review of the BST-863 station that can be had for well under $200. You can see the video below.

He was impressed with the build quality of the workpiece holder. It lets you store the hot air gun and keep it in standby mode. He liked the touchscreen, too, although the beeping seemed a bit annoying. However, in general, the operating noise was less than the older unit it replaced.

It only took 8 bolts to open the case, and mostly the internal build looked pretty good. There’s a lot of wasted space in the case and the grounding was a little fishy, but we’ve certainly seen worse — a lot worse. It was odd that there was a mix of through-hole and surface mount components.

One other item noted was that the AC line connector’s blade connectors were a little loose. It was easy enough to crimp them down to fit better. Overall, it looked like a good buy. Wit the nice screen, we wish someone would reverse engineer the firmware so the thing could be hacked like some of the other cheap stations.

Viewing all 28 articles
Browse latest View live


<script src="https://jsc.adskeeper.com/r/s/rssing.com.1596347.js" async> </script>